4 Core Exercises You Should Know

Are you overwhelmed by the vast array of core exercises available? With so much information—and misinformation—about core training, it can be hard to know where to start. In this blog, we’ll clarify the essentials of effective core exercises, especially those you can do at home. We’ll focus on what truly matters for enhancing performance and preventing injury.

Rather watch or listen?

Concepts of Core Training

Breathing is crucial for stabilizing the core. When we breathe properly, we are in a safe state and can stabilize effectively. Specifically, we need to focus on diaphragmatic breathing. Here’s what that looks like: your tongue lightly touches the roof of your mouth and your top teeth. Your teeth are slightly apart, and you breathe in through your nose. Think about breathing up rather than straight back, allowing your abdomen to expand 360°—front, sides, and back—creating intra-abdominal pressure. As you exhale, your abdominals contract.

This breathing pattern is often overlooked. Many people hold planks for two to three minutes without proper breathing or do sit-ups and crunches while holding their breath. But breathing is the key.

Let’s dive a little deeper. When you inhale, your diaphragm flattens, creating intra-abdominal pressure. The transverse abdominis, which acts like a weight belt, lengthens. At the same time, your pelvic floor relaxes. When you exhale, your pelvic floor lifts, the transverse abdominis contracts, and the diaphragm returns to its resting shape. This sequence involves the pelvic diaphragm and respiratory diaphragm working in harmony, along with muscles like the psoas, multifidus (which surrounds the spine), and deep hip stabilizers.

4 Core Strengthening Exercises You Can Do at Home

Now, let’s go through some exercises to understand how all of this fits together.

1. Breathing with Punch

Lie on your back with your knees at a 90° angle. Connect your rib cage and spine to the floor. Start with a deep breath in, expanding your abdomen. Then, grab a light weight. As you exhale, punch upward, engaging your serratus anterior. This connects nicely with the diaphragm, creating tension and integrating the core with the upper body.

2. Side Sit

Align your elbow with your knee, and sit your hips back on the floor. Keep your rib cage over your pelvis. Exhale as you come up to full hip extension; inhale as you lower back down. Modify as needed for your hip mobility, but aim to keep your body parallel with a wall in the final position. The key is maintaining that stacked position throughout the exercise.

3. Plank with Hands

Position your hands slightly in front of you in a hollow position, finding the stack of your rib cage over your pelvis. Keep your feet together and your pelvis slightly tucked. Use your breath as the guide: inhale fully to expand, and exhale to contract your core.

4. Step-by-Step Hollow

Lie on your back and exhale to flatten your spine against the ground. Inhale slightly, then exhale as you pull one leg towards you. Inhale again, then exhale to drive the other leg up. Engage your core by thinking of pulling your heels towards you. Next, inhale and exhale as you reach both arms overhead, maintaining tension through your fingertips. While in this position, take small inhales and forceful exhales to keep tension and prevent your back from arching. As you progress, you can advance to reaching with one arm, then the other, and finally into a full hollow position when you can maintain tension throughout.

Key Takeaway

In all these exercises, focus on keeping your rib cage aligned over your pelvis. This alignment ensures effective communication between your respiratory and pelvic diaphragms. Breathing is the foundation of every movement pattern, and by focusing on quality, slow, intentional movements, you can build the sequence, coordination, and timing of these muscles working together.

Once you understand these concepts, you can progress to more advanced core strengthening exercises at home, developing greater tension and training for more powerful movements. A strong foundation allows you to train rotational power, strengthen the abdominal wall, and create full-body tension with the core as the central point.

Share Your Experience

Give these core exercises a try, and let us know how it goes! We’d love to hear your comments and experiences. If this was helpful, please give it a like, share it, and subscribe to our YouTube channel, the Movement Paradigm, for weekly tips on mindset, nutrition, and movement. Our goal is to help you live your best life, heal, transform, and, more importantly, thrive.

Join Our Community

You can always join us in our app, the Movement Paradigm. We have lots of challenges every other month—everything from movement to the nervous system, nutrition, and so on. And we have a great community of people. 

You can also reach out to us for an individual appointment for functional medicine or holistic physical therapy. If you really want to get to the root cause, please reach out to us.

Other things that might interest you:

How to optimize your core

8 causes of LOW BACK PAIN that isn’t a weak core

How to train your core without crunches

How to optimize your core

Have you ever wondered why your core is so important for your overall physical performance?

While many people focus on building a strong core, there’s more to it than just a toned midsection. Your core is responsible for much more than you may think as it plays a critical role in sequencing, timing, and coordination—all of which are vital for optimal motor control.

By improving your core function, you can move more efficiently, generate more force, and prevent injuries, all of which can help take your physical performance to the next level.

In this blog post, we will discuss how to optimize your core for better function and performance, so you can achieve your fitness goals and enhance your overall health. So, let’s get started!

Rather watch or listen? 

Anatomy

The first thing we need to consider when optimizing our core function—our foundation—is stacking or positioning the rib cage over the top of the pelvis.

As we age, we may develop a forward head posture, a tilted pelvis, or a flaring rib cage, all of which can impact our core function. It’s important to remember that posture affects respiration and vice versa—they are interdependent on each other.

Mechanics of Core Function

When we’re optimizing the pressurization system of our core, we need to think about the rib cage being positioned over the top of the pelvis. If the rib cage flares out, we have an open scissors posture, which unfortunately prevents the diaphragm from communicating effectively with the pelvic floor.

Bringing the rib cage back to its neutral position allows for better communication between the two. This creates an opportunity for them to work together more effectively.

Breathing and What’s Happening

When we inhale, we breathe oxygen into the base of our lungs. The diaphragm, a large dome-shaped muscle that separates the thoracic cavity from the abdominal cavity, flattens and compresses all the organs below it, increasing intra-abdominal pressure. This pressure isn’t just a belly breath; we need lateral rib cage expansion and posterolateral expansion to the back of the rib cage.

As the pressure travels downward, it reaches the pelvic floor, causing it to lengthen and relax. If the pressure doesn’t reach the pelvic floor, it won’t lengthen or relax as much as it should. As the pressure goes down, the transverse abdominis muscle, otherwise known as our natural weight belt, eccentrically lengthens.

When we exhale, the pelvic floor and the transverse abdominis muscle contract, creating a weight belt compression, while the outer abdominal muscles, including the six-pack muscles, contract. The rib cage comes down, and the belly button goes in, resulting in a nice core contraction.

Now that you understand the mechanics, envision that when we inhale, the pressure goes down all the way to the base of the pelvis, creating even pressure around the abdomen. This intra-abdominal pressure is fundamental for core function and associated with pelvic floor function, bladder and bowel control, and efficient stabilization.

Think of the diaphragm and the pelvic floor as doing a rhythmic dance with all the surrounding muscles.

Ways to Optimize Core Function

There are many ways to optimize core function and get some feedback for this.

1. Use a TheraBand

One way to exercise is by using a TheraBand. To do this, you should place the band behind your rib cage, focusing on the area around T8, which is just below your sternum.

Next, pull the band slightly to create tension. You can cross the band at this point to make an angle of about 12 degrees, which matches the angle of your ribs. As you pull down on the band, try to breathe deeply into the back of your rib cage.

Breathe into the, while feeling this feedback to optimize your rib cage breathing.

2. Bring Your Legs up to a 90-degree Angle

The next progression is bringing your legs up to a 90-degree angle and feeling the rib cage expansion.  Brind the xyphoid process (underneath the sternum) towards the floor as well as below the belly button.

As we breathe in and out, we want to feel the back of the rib cage. When we breathe in, we should feel that expansion. When we breathe out, we should bring the belly button in towards the spine.

To progress it

From this position, you can add a block or weight and add a punch. The serratus muscle deeply integrates with the diaphragm. Hold that for three seconds and then relax.

The Bottom Line

Hopefully, those two exercises were really helpful. These are just two of many, but they can really begin to give you some awareness of your core function. How your rib cage and your pelvis work together in unison, and how all of these muscles are based on sequencing and timing, and coordination.

Our core isn’t strong or weak; holding a plank for five minutes does not mean your core is strong. That’s not the way we test the core. Understanding this beautiful representation of how these have to work together is the way we optimize our core function.

Ultimately, this means decreasing the risk of injury, moving more efficiently, and optimizing your performance in life and sport.

So, if this was helpful, of course, make sure to give it a like, give it a share, and subscribe to our YouTube channel, The Movement Paradigm, for weekly tips on mindset, nutrition, and movement.

If you’re looking for support on your health journey, we’re here to help! Feel free to reach out to us for a discovery session.

Other things that might interest you:
Why you should stop “stretching” your hip | HIP PAIN

Do you have hip pain that you are continually trying to stretch, roll, or smash, and nothing seems to get better?  Before we get into the role of the psoas, one of your key hip flexors, let’s speak about the local stabilizers and global stabilizers of the body. This is important to understand how you are going to treat your hip flexors and hip pain.

Think of the local stabilizers as being muscles that are close to the joint. They create more of an isometric contraction versus concentric (shortening) or eccentric (lengthening) contraction. They control the joint centration which means keeping the joint centered in its axis. It’s also independent of the activity of motion so if you raise your arm overhead, the deep stabilizers in my spine are going to activate before your arm goes overhead. Essentially these local stabilizers are imperative for stabilization in the body so that we can have proper movement.

Our global stabilizers are equally as important. However, they have a different role, so they have more of an eccentric contraction. They decelerate the range of motion, are continuous with motion, and are farther away from the joint.

Now getting back to the psoas, which is what everyone wants to stretch when they have hip pain.  The posterior or the back of the psoas is a local stabilizer. Think of it as one of our deep core muscles that is helping to stabilize the spine and also prevent the femur, our leg bone, from shifting forward in the hip joint. The anterior or front of the psoas serves as a global stabilizer. So, it is necessary to think of the psoas muscle as a stabilizer. Not only is it a stabilizer but it works in an integrated unit with all of the other muscles, including the pelvic floor, diaphragm, multifidus, the deep five rotators in the hip, and the transverse abdominus. All of these have to work together, and once again in this integrated fashion to be able to stabilize the low back and the pelvis during any kind of movement.

For example, if you performed a chest press with 30 pound in each hand on a bench and then transitioned into doing that on a stability ball, your weight would naturally go down. Why? Because you now have an unstable platform to work from and therefore can not generate as much force.

There are a lot of different hip pathologies that we won’t get into today, but when you have hip pain it typically happens from losing the deep stability of the hip. There are two common muscle imbalances that will exist. One is the TFL(tensor fascia latae) muscle, which is right in the front lateral side of the hip, can get tight, especially with increased sitting. Based on this attachment, it will pull the hip forward, and that will therefore inhibit or shut down the psoas. The other common muscle imbalance is the hamstring muscles, which can get tight for various reasons, inhibiting the glute muscles. The hamstrings can push the femur forward and that also leads us to lose that optimal position on the hip joint. Overtime if we have these muscle imbalances, instead of the hip being centered in the axis, it will start to shift forward and up. This will cause all types of pain issues and pathologies. Whether that’s a labral tear, hip impingement, tendinopathy, bursitis, and so on. So, it is important to get the hip stabilized and centered in the joint in order to decrease pain and ultimately improve function.

You can begin to do this through a four-step process. This is a great way to begin to address your pain, as well as any kind of movement compensation, and most importantly, integrate your foot with your core, in a very integrated manner. First is inhibiting the tissue, in this case we inhibited the TFL muscle that typically pulls the hip joint forward and creates that inhibition of the psoas as a deep stabilizer. Then, mobilize the hip joint to center the hip joint. Remember that when it is not in that center position it’s shifting forward enough so we’re shifting it back to the center position. Next, stabilize it by activating the deep stabilizers, such as our diaphragm, pelvic floor, etc. Then we’re integrating it with the ground. This is super important because the foot is part of the core and they work as an integrated unit. To get those deep stabilizers of the hip firing, short foot, i.e. foot to core sequencing, allows us to do that in a very integrated fashion.

4 Steps

1. Inhibition

For the TFL release, place the ball right on the outside of the hip. When you lie down, you’ll naturally rotate the hip in, which will expose the TFL muscle. With the other leg, anchor it up at a 90-degree angle and come down to your forearms. Holding that position your leg will be nice and long, naturally rotated in, and breathing throughout the exercise trying to relax into it.

2. Mobilization

For the hip mobilization with a band, you’ll place the band high up in the groin. You’ll have it back at a 45-degree angle away from you. You’ll start in a table position rocking forward 15 times, making sure your spine stays nice and long, and you’re breathing. Then rock away from the band, so to the opposite side, once again about 15 times, making sure you’re breathing throughout the exercise.

3. Activation

Now it’s time to activate the deep core, so you can do this by diaphragmatic breathing. Inhale, breathing into the abdomen and into the base of the pelvis allowing the abdomen to expand 360 degrees. Exhaling, letting the abdomen contract and the belly button in towards the spine. Once you feel like you have this established, then on your inhale allow the pelvic floor to relax, so you can exhale and gently lift the pelvic floor about 20% contraction to get a deeper integration. You want to think of this as a rhythmical balance, so nice and fluid. Inhaling to the base of the pelvis and exhaling gently lifting the pelvic floor.

4. Integration

Lastly, it’s time for integration. This is to be done with short foot. Standing on one leg, sitting the hips back, knees slightly bent, taking a breath in, while your foot relaxes then exhale and gently root the tips of the toes into the ground. That will naturally lift the arch and lift the metatarsal heads or ball of the foot.

So whether you have hip pain or hip tightness and are constantly stretching your hips, hopefully, this video will give you a little bit of insight to allow you to think about your hip differently and recognize that it is part of an integrated unit. It is really important to understand how that works as it relates to stabilization and movement

If you’d like to schedule a free 15 minute virtual discovery session, please email [email protected] or text 302-373-2394 to schdule. We’d love to help you get healthy again!

For more content, make sure to subscribe to our YouTube channel here.

How to train your core without crunches

Did you know that you do not have to do crunches and sit-ups to train your core? In fact, crunches, sit-ups, and many other similar core exercises can negatively impact your core, especially if they’re not done properly. How can you train your core without doing crunches?

Rather watch or listen?

What comprises our core?

Let’s break the core down. We have our local stabilizers, global stabilizers, and global mobilizers.

Our local stabilizers include our pelvic floor (base of our core), diaphragm (breathing muscle), multifidus (along the spine), transverse abdominals (like a corset), deep posterior psoas (hip flexor), and the deep hip stabilizers (deep five). These muscles are close to the joint and isometrically contract to create stability and control the joint positioning. This improves what we refer to as joint centration, maintaining our joint on its center axis.

Next, we have our global stabilizers. This includes our glute medius, obliques, spinalis muscles in the back, and quadratus lumborum. These muscles are also geared toward stabilizing, but they create more of an eccentric range of motion. They decelerate motion.

Lastly, is our global mobilizers. This includes rectus abdominis, latissimus dorsi, and quadriceps, and so on. These muscles produce force. They initiate force and movement. All of these are equally important. However, one has to come first, and that is the local stabilization. We have to be able to stabilize our joints to be able to produce force and power from a stable foundation. If you don’t have a stable foundation to operate from, an injury will occur.

Why is it important?

When we refer to the deep core and how it is intimately connected with your feet, and the rest of your body, I like to use the reference of the deep front fascial line. This connects from the bottom of the foot fascially all the way up through the inner thigh, pelvic floor, deep stabilizers, diaphragm, and even the neck. The beautiful representation of this fascial tensegrity is a great visual of how our body is connected, and how our feet are actually part of our core.

Another great way to appreciate this deep local stabilization and the importance of the local stabilization before the global stabilization is a hernia.

Whether you or someone you know has had an umbilical hernia, inguinal hernia, abdominal hernia, or sports hernia, this is a perfect example of where the deep core was not stabilizing efficiently. There was so much stress on the outer core musculature and poor pressurization in the abdomen that it caused a tear in the abdominal wall, or in the case of a sports hernia in the fascial tissue.

In the case of a sports hernia, which is very common but often much overlooked and misdiagnosed, the fascial tissue most often affected connects the rectus abdominus and the adductor. The adductor muscle will have a mechanical advantage so when there is a loss of deep stability, it will create a tear in the fascia in the rectus sheath. You cannot rehab this since you’ve lost the integrity in this force transmission system.  It can only be surgically repaired.

Now, back to the deep stabilizers. It is important to train the deep inner local system before the deep outer global system to prevent things like hernias, back pain, hip pain, and neck pain You can have an optimal foundation to work from to generate force with power and be able to do the things that you want to do. If you are doing crunches, sit-ups, or leg lowers without a proper foundation, read on.

What exercises can you incorporate in your routine?

Here are five different exercises that you can incorporate into your routine or refine if you’re already doing them so that you do not need to do crunches and sit-ups, but you can do these exercises to maximize the potential of your core.

1) Diaphragmatic breathing with pelvic floor contraction

As you inhale lengthen the public floor, relax, and then as you exhale gently lift the pelvic floor about 20 percent contraction in the direction of your head. Repeat this for eight to ten breaths working on the coordination and rhythm of the breath with the pelvic floor contraction.

2) Step by step hollow

Take a breath in and flatten your back as you exhale. Next, take a breath in, exhale, and lift your head and shoulders, reaching through your fingertips. Take another breath in, exhale, and pull your hamstring in towards your body, and then repeat with the other side. If that feels appropriate there stay in that position for a couple of breaths. If you’d like to progress, take a breath in, exhale, and raise your arms overhead keeping the hollow position and the tension. Then reach with the other arm. If you’d like to go to the full progression if that feels appropriate to you, then you would extend one leg, and then extend the other leg.

3) Beast

The beast position is in a stable position with your index finger parallel and spreading your fingers wide. Then corkscrew your shoulders, tuck your toes under, and lift your knees approximately two inches or so above the ground. Use your breath as your repetition. You can do this for as many breaths as you can hold. You can also progress into a crawling motion.

4) Side plank

This helps with lateral stability. The first progression is with your elbows underneath the shoulder, the bottom knee bent, and the top leg straight. If you’d like to progress this you can go into a staggered stance or even a stacked posture.

5) Foot to core sequence

Standing on one leg in an athletic position, take a breath in, as you relax your foot relax your pelvic floor, exhaling rooting the toes into the ground. Repeat that for five to eight breath cycles. As you do that you’re rooting the tips of the digits into the ground. You can then move into a bowler or any other type of dynamic motion, inhaling back and exhaling short footing, and coming back to the standing position.

There you have it—five different ways you can begin to shift your core training to focus on local stabilization before moving to global stabilization and movement. You can use these as ideas. There are endless exercises that can fit into this category but this is just to get you thinking a little bit differently about how to train your core the best way possible so that you can improve your performance, decrease your injury prevention, and feel your best.

Reach out for a 15-minute FREE discovery session to see how we can help you on your journey.

For more content, make sure to subscribe to our YouTube channel here.

Other things that may interest you:

Vagus Nerve Hack | Sphinx

Vagus Nerve Hack | Hand Reflexology

Top 5 Vagus Nerve Hacks to Help You Relax and Restore

THE TRUTH ABOUT YOUR BELLY FAT

Do you have belly fat that you just cannot seem to get rid of? You’ve tried different nutrition plans and exercise programs, and it just won’t budge. You also know that there is a lot of risk of having abdominal weight gain, but you’re just not sure what to do about it.

Although you may not want to hear this, abdominal weight gain is linked to high cortisol levels, which is one of our key stress hormones that is released during the hypothalamic-pituitary-adrenal (HPA) axis, our stress pathway. When we have chronic stress, we have chronic cortisol release, among other stress hormones that are linked to abdominal weight gain, obesity, and increased visceral and subcutaneous fat.

Rather watch or listen?

How many types of fat do we have?

There are two types of fat that we’ll see in the abdominal region, one of which is subcutaneous fat, and the second is visceral fat.

Subcutaneous fat produces helpful hormones, one of which is leptin which suppresses your appetite and helps to burn fat. Two is adiponectin which helps regulate fats and sugars.  So, if there’s any increased abdominal fat, then this will impact the production and function of these hormones. The visceral fat will be found around the liver, intestines, other organs, and even underneath the abdominal wall.

An interesting thing about visceral fat is that the more visceral fat you have, the harder and thicker it becomes. It becomes denser, so that’s when you may feel that your stomach feels hard and not as elastic as it once did. This, of course, can increase inches to your waistline.

In addition to that, you also have increased cytokines in your visceral fat. There are more cytokines in the visceral fat than there are in subcutaneous fat. These proteins are linked to low-level inflammation and inflammation is linked to many chronic diseases. Lastly, it also releases more retinol-binding protein, which will contribute to more insulin resistance.

Based on research, having increased abdominal fat is linked to colorectal cancer, dementia, asthma, cancer, and cardiovascular disease. Just remember that abdominal weight gain does not discriminate among genders. So, men and women both can get abdominal weight gain. Women are more susceptible to it after they’ve gone through menopause because their estrogen levels have decreased, which is linked to high cortisol levels over time and chronic activation of the stress pathway.

Now, what can you do about it?

1) Stress management

This could include practicing mindfulness, meditation, journaling, speaking to a counselor, and trying to be aware of your responses during your day-to-day actions of life. We cannot get rid of stress, but we can learn how to respond to our stressors more effectively. We can respond with clarity and creativity, rather than reacting. When we can begin to do this we can shift our nervous system into a state of more social engagement, safety, a grounded, mindful state rather than in a fight or flight or freeze state.

2) Anti-inflammatory diet

This can be very challenging for many people. The Standard American Diet (SAD) is filled with processed, high sugar, high-fat foods. Aim to have a diet low in sugar, processed foods, and try to eat more clean and natural whole foods.

3) Exercise

First, determine what level of exercise is appropriate for you. If you are in a state of chronic stress, then doing high-intensity interval training is not appropriate because that is also a stressor that can put you into a state of complete overload. Identify the appropriate level of exercise, be consistent with your exercise, and remember that exercise is not the same as movement.

We exercise 30 minutes a day, but we should be moving all day long. We should be consistently increasing our movement levels, which means sitting for no more than 20 to 30 minutes at a time before we get up and move our bodies. Our bodies are meant to move, they crave movement, and if we don’t do it, we lose it.

4) Sleep

Sleep is more important than nutrition and exercise combined. Aim for seven to nine hours a night.  But, It’s not only about how much sleep you’re getting, but it’s about the quality of sleep you’re getting. How much REM and deep sleep are you getting? Are you giving yourself enough time to down-regulate your nervous system before you go to sleep, are you using your phone up late at night or watching TV and stimulating your nervous system as opposed to calming it down and preparing for a restoration process?

If you are chronically sleep-deprived, this will increase the stress response in your body and contribute to weight gain, specifically around the mid-section.

Good luck in addressing your abdominal weight gain, i.e. stress belly.

Reach out for a 15-minute FREE discovery session to see how we can help you on your journey.

For more content, make sure to subscribe to our YouTube channel here.

Other things that may interest you:

Nutrition Nail Exam

What your pelvic floor has to do with your tight hips

How Your Vagus Nerve Affects Your Gut Health

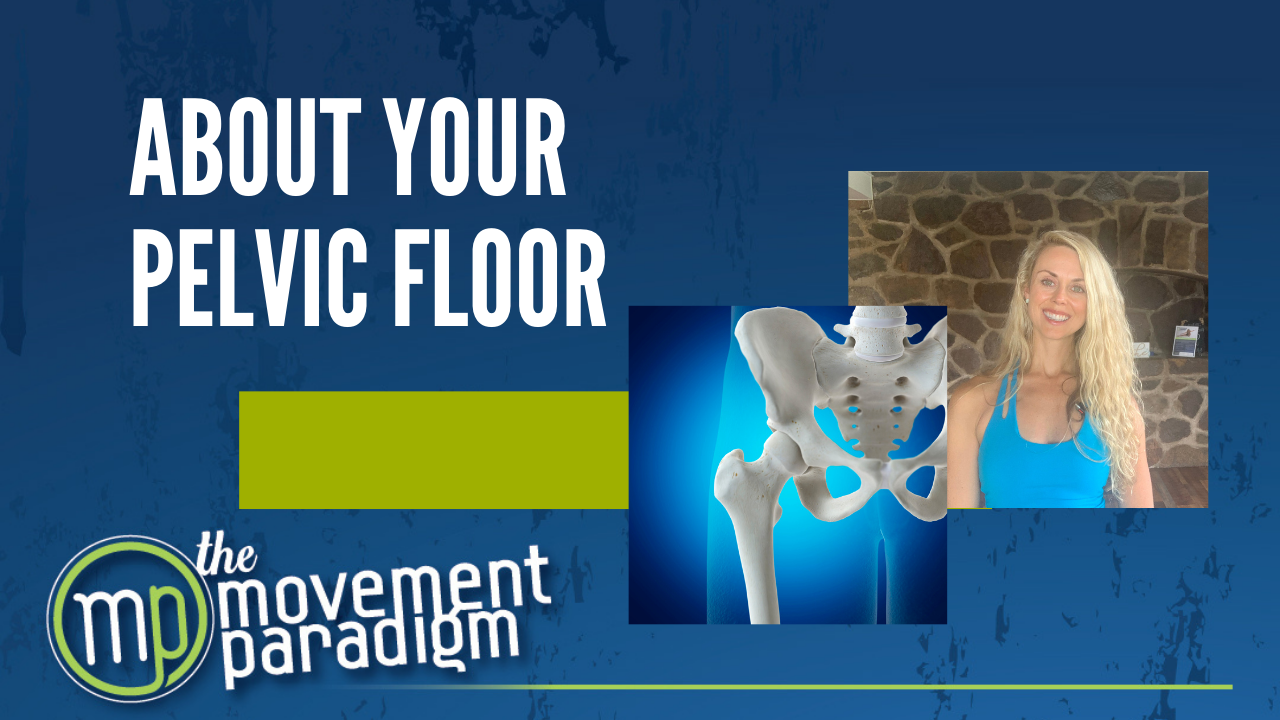
WHAT IS A HEALTHY PELVIC FLOOR?

Let’s discuss a much-overlooked topic in modern medicine, especially as it relates to rehabilitative medicine… the pelvic floor. Yes, both men and women have a pelvic floor, and both can be compromised and contribute to many different conditions including but not limited to incontinence issues, sexual issues, and chronic pain.

The pelvic floor is essentially the base of our core. It has to be integrated with the rest of the surrounding anatomy. That means the organs, the bowel and bladder, the connective tissue, and the ligamentous tissue all have to be deeply integrated and fine-tuned for everything to work in this rhythmical dance back and forth.

It also helps to support our daily functions, prevent urinary and fecal incontinence, improve sexual function, and many other functions that we’ll discuss.

So, what does a well-activated pelvic floor actually do?

1) We are constantly transmitting force through the body. So, a well-activated pelvic floor is going to attribute to the closing force to prevent any leakage of urine, fecal, or gas.

2) Research shows that between 60 to 80% of women with stress urinary incontinence can cure it or significantly improve it with pelvic floor retraining.

3) A well-activated pelvic floor is also going to allow the appropriate relaxation response of the pelvic floor muscles to allow for proper emptying of the bladder and to prevent any post dribble or leakage after you’ve finished urinating.

4) It should also be relaxed enough for proper evacuation of the bowel, but provide enough resistance for optimal defecation.

5) It supports internal organs such as the vagina, the bowel, and the bladder. Especially as it relates to women and pregnancy, the more intact the pelvic floor musculature is, the less likely there will be a prolapse.

6) It increases the tone which allows for greater sexual awareness. You need to have a pelvic floor that can relax completely so that you can have more pleasurable pain-free sex.

7) A well-activated pelvic floor will relax and significantly stretch during vaginal delivery.

8) A well-activated pelvic floor will work in coordination with your diaphragm and the rest of the abdominals. This is very important in looking at overall movement and movement efficiency.

Why is a well-activated pelvic floor important?

In summary, a well-activated pelvic floor is important for so many necessary functions. When it is not functioning well, it can contribute to a whole host of problems. One of which, that we see consistently in our office is pain.

Chronic pelvic pain, low back pain, hip pain, and even knee pain can all be driven by pelvic floor dysfunction. It’s way more common than you think!  It’s also an area where we tend to hold our emotions. So, I want to point out that as important as it is for the pelvic floor to contract, it is equally important for the pelvic floor to relax.

If it is always tight, then we are not able to fully contract and fully relax it. This can contribute to the same issues. That is why it is very important to get evaluated properly. If you are having any type of symptoms that might indicate you have a pelvic floor issue, please contact our office to schedule a pelvic floor examination.

Reach out for a 15-minute FREE discovery session to see how we can help you on your journey.

For more content, make sure to subscribe to our YouTube channel here.

Other things that may interest you:

Stop Stretching Your Hamstrings

3 AREAS IN YOUR BODY YOU HOLD YOUR STRESS

Why You Shouldn’t R.I.C.E.

How to Start a Fitness Program or Step up Your Game

Who’s excited for the New Year? You may be thinking “new year, new me,” so you want to either start an exercise program or step up your game. I am here today to help you with that! This is a time when so many people get injured because they are trying to start a fitness program for the first time or they’re trying to step it up too quickly. And nearly 80 percent of New Year’s resolutions fail.

Let’s take this as an opportunity to help you think about some different aspects of fitness, so you can prevent injury and get the most out of your fitness and your health this year.

Know your baseline

The first and most important thing is knowing your baseline. Are you a beginner, intermediate, or advanced fitness enthusiast? Do you have any pain or discomfort, or any potentially old injuries that you’re dealing with? What is your mobility/ stability, or functional movement, baseline? Working with a qualified professional to properly screen and know exactly what your starting point is highly recommended.  

If you don’t have that opportunity, then you really want to be able to seriously reflect on your true baseline, your starting point, so that you know how to systematically progress safely from there. Once you figured that out, now we can jump into what to include in your fitness program.

Rather watch or listen than read? Click here.

1) Warm-up and prepare

This does not mean jumping on the treadmill for five minutes to get your body warmed up for your workout. It means taking the time to tune into your body. Notice what pain or tension you might have that day. Are you tired? Did you eat well that day?  Really take a deep inward look to see how you are feeling that day and how that will affect your workout. Once you’ve established that, then you can think about how can you prepare yourself best for the demands of the activity that you are about to embark on.

If you are going to do strength training for example, then doing some static stretching, ie holding a stretch for 30 seconds, is not beneficial. Instead, think about how you can prepare your body for the demands of the activity. For example, instead of jumping on a treadmill and walking for five minutes, you could do lunges with a reach. This will help to activate and wake up your whole body and nervous system, so you are fully prepared for your workout. 

2) The systematic progression of your activity.

For this to be successful, it is vital to have a preparation period. One to three months preparation time is recommended to prepare for it so that you can just go into it with ease. The last thing you want it to do is to create stress, ie. Inflammation, on your body.  You’ll want to make sure it is the right time in your life and things are relatively calm. It is extremely challenging to eat out when you are on the Elimination Diet. Lastly, it’s often easier if you slowly work out one to three foods at a time and find replacements for them before you begin. You want to be fully prepared, which is why it is strongly recommended to work with a professional to guide and support you through the process.   

How to do this for a running program

If you are just starting out with a running program, running for 30 minutes three times a week is unrealistic, especially if you haven’t done that in months or years. That will set you up for injury. When, starting a running program, or any program for that matter, you won’t put stress on your body, and then take it off, put stress on your body, and take it off, and so on. This will create an adaptation, which means you are getting your body familiar with a certain exercise or training program through repeated exposure. This will help to create fascial elasticity in our body, like a rubber band, which can really aid in preventing injury.

If you want to start a running program, make sure that you can walk for 30 minutes three times a week first without any symptoms before you progress to running in any capacity. You encounter 1-1.5 x your body weight in force with walking and almost double that with running.

When you’re symptom-free and ready to progress, you would slowly start with a walk-jog interval. You could start with one minute of walking and one minute of jogging. I would suggest starting at five minutes total, so it’s only a few minutes total running time. Once you feel comfortable with that, then you can slowly progress to 10 minutes, and then 15 minutes, and so on. This is going to take weeks to months to get you to 30 minutes of running.

On the other hand, if you’ve already been running, and you want to step it up you could follow the same protocol, but you would just have a different baseline than a beginner does. For example, if you want to go from 20 minutes to 30 minutes, then every other day you can add a few more minutes to your run assuming there are no symptoms, pain, discomfort, or injuries. You can continue to progress that way to achieve whatever goal you have.

How to do this for a strength training program

If you’re strength training for the first time, I would suggest starting at two sets of eight to 12 repetitions two times a week. Then you can slowly progress that towards three sets of 10-12 repetitions three days a week.

How to do this for a yoga program

There are a lot of different yoga classes out there, but you need to make sure that it’s a yoga class that you can do safely. For example, a Hatha yoga class may be more appropriate for a beginner as opposed to a power yoga class. It doesn’t mean that you can’t ever do that, it just means to start with something where you can learn how to control your body and coordinate your movement with your breath first before you go into something more advanced.

How to do this for a HITT training program

Please reference the video for the pros and cons of HIIT training here or read the blog post here. For the intermediate to advanced fitness enthusiast, this can be a great way for you to step up your program. Beginners have a higher injury risk because they really need to develop a basic fitness or strength baseline before they move into something more advanced like HITT training.

3) Cool-down

A cool-down is different for every person. It could be a short walk, stretching, basic breathwork, or even meditation. It can also be a great way to reflect on what happened in that session. That means reflecting on what went right and what didn’t go as well.  Does your body feel energized and revitalized or does it feel kind of worn down and sore? Did you work too hard or not hard enough? Use this information as an opportunity to change your next session.

Summary

Fitness is a journey, no matter if you are a beginner, intermediate, or advanced. You are always fine-tuning, and reflecting on how to maximize what you are doing.  Do you need to add yoga in because you’re doing too much strength and HITT training? Do you do too much yoga and need to add in strength and power exercises? I definitely encourage you to reach out to a professional that can help you reach your goals while staying injury-free. It is important to take ownership of your health and movement to be able to continue to stay pain-free for a lifetime.

If you are interested in feeling your best and need help, reach out to schedule an appointment to get you started on your journey.

Reach out for a 15-minute FREE discovery session to see how we can help you on your journey.

For more content, make sure to subscribe to our YouTube channel here.

Other things that may interest you:

5-Minute Golf Fitness Screen

MyFitnessRX Episode: Surviving a Stroke

MyFitnessRX Episode: Baking Bread

Pros and Cons of HIIT

With the holidays coming around, many of you may want to get fit as fast as you can. We all know deep down that’s not the best solution. But, part of improving your fitness quickly probably includes some kind of speak of high intensity interval training (HIIT). As with anything, there are pros and cons of HIIT and I’d like to educate you on making an informed decision of whether or not it’s appropriate for you.

What is HIIT?

You may be asking yourself what is HITT ? It is essentially a vigorous activity, followed by a low to moderate intensity activity in an interval format that is often done between five to 30 minutes, and the intervals can range from 15 seconds to two to three minutes. There are many options to perform HITT such as using bodyweight, calisthenics, free weights, or even a machine like an elliptical or stair climber.

Rather watch or listen than read? Click here.

Pros

First, it can help to decrease body fat, as well as improve overall metabolic rate. Metabolic rate is really important because it helps you to burn more calories throughout the course of the day when you’re not working out, which is really powerful. Second, it can help improve oxygenation, which is the muscles ability to use oxygen. This means if you do 60 minutes of HITT training versus 120 minutes of steady state cardio you can have the same benefits. This leads me to my next point, which is that you get maximum benefit for decreased time investment. Since we are all super busy and stressed for time, and can’t find the time in the day to exercise, this can be very valuable. It has been shown to also increase muscle growth, however, that is not the gold standard of muscle building.  Strength training always wins. Even though there has been shown some benefit, it’s not the most valuable way to build muscle.

Cons

Let’s shift gears now and talk about some of the disadvantages. First, it can lead to a higher injury risk. Some of the reasons why I think this happens is because many people that choose to do HITT training are often deconditioned at first and they think ” this is a fast way to get in shape”. So, they begin doing it at a high volume, high intensity and often do not have a solid movement foundation, or even a fitness foundation to support it. This is why I would recommend starting out slow and then gradually building yourself up. Second, recovery time is always important in exercise, but it is especially important in HITT training. This is because it is a physical stressor on your body, so you need more time to recover. HIIT four to six days a week is extremely high because the it may take two to three days to recover from a session.  I typically recommend my patients and clients do it no more than two to three days a week if they are an appropriate candidate. Lastly, if you are training for a sport or a movement skill, you need to make sure that you’re really focusing on the specificity. HITT training is not geared towards specificity whatsoever. It is general conditioning, so you may want to consider that with your training goals.  

Other considerations:

  1. Stress? Are you experiencing a tremendous amount of acute or chronic stress in your life. If so, I do not recommend HITT training, because again, it is a significant stressor, a physical stressor. This can contribute to a constant cascade of stress hormones which also can further impact hormonal and immune health.
  2. Beginner? If you are a beginner, I do not recommend HITT training. Learn how to develop the proper movement patterns, learn about your body, and really understand what’s happening to be able to recognize if you are feeling discomfort or pain. Tune in through mindful movement and develop a basic level of fitness first before volume and intensity is added.
  3. Intermediate to Advanced? If you have been working out for a while and you want to take things to the next level to really boost your cardiovascular fitness and fat loss, then I think HITT training can be really valuable.

Summary

Nothing is black and white. It’s really about understanding the different pros and cons of this or any other fitness program to see if it is appropriate for you at this time in your life. If it is not appropriate for you at this time in your life, then just hold off and revisit it later.  It will always be there.  Movement is a skill that you keep refining your whole life. There’s so much to learn. You really want to continue that journey forever, so there’s always room for improvement.

If you are not sure where to start, please reach out to schedule a private session to begin your movement journey.

3 Simple Informal Mindfulness Practices

Let’s chat about some informal mindfulness practices that you can do in your day to day life to become more aware, more present, and more connected. Often times we think about meditation as sitting in a meditative seat for 30 to 45 minutes. You might think, “how on Earth and I am going to do that?” I want to reinforce how important that practice can be in an overall mindfulness practice, however, that’s not for everyone. There are many things that you could do in your daily life to become more present in your own life, become more connected, more aware and hopefully help you to live your best life.

Rather watch or listen than read? Click here.

Three Informal Mindfulness Practices

  1. Find an anchor.
Read moRE

How to decrease sugar cravings in 3 days

Many of us struggle with sugar cravings. Some people suffer from some type of sugar craving or even a so-called sugar addiction all year long. So, how to decrease sugar cravings in as fast as 3 days?

We know that sugar cravings cause a dopamine response as well as other neurochemicals that ultimately create a biochemical and neurochemical response in the body. The addiction to sugar can cause a similar response in the brain as in drugs, alcohol, or cigarettes.  However, there’s a little bit more to sugar cravings than just that.

Rather watch or listen?

Sugar Cravings and Gut Bacteria

Sugar cravings also come from our gut bacteria! Our gut bacteria are actually communicating to us that they want something. They have a mind of their own! Well, our gut is, in fact, our second brain. We have a trillion bacteria in our gut, and there are different types of bacteria that actually love different nutrients. Some love carbs, some fiber, and some love fats, for example. When we are not feeding those bacteria what they want, then they get really pissed off and can make us feel like crap. Therefore, it is really important to have a balance of beneficial bacteria in our gut. And we need a lot of diversity. That’s why it’s so important to have a very well-balanced diet with a variety of whole, nutrient-dense foods. This helps to create the optimal microbiome for health. Remember… 70 percent of our immune system is in our gut.  The bacteria in our gut help us to maintain a healthy digestive tract and metabolize, digest, and absorb nutrients.  Our internal gut flora can really help maximize our immune health when we treat it well.

What can you do about cravings?

So, you may be asking, what can I do when I have these sugar cravings?  In two to four days, you can shift your gut bacteria. If you can commit to three days altering your microbiome, then you can start to begin to feel much better and likely not have the same cravings that you once did.

First, it is important to rule out a yeast overgrowth, especially if you are having significant sugar or carbohydrate cravings on a regular basis.  This can be done through certain bloodwork, questionnaires, and of course a detailed evaluation of clinical presentation and symptoms.

How to decrease sugar cravings: 3-day microbiome challenge

The goal is a healthy, balanced, clean diet for three days with lots of fiber from fruits, vegetables, nuts, and possibly some lentils or beans. You can use the well-researched Mediterranean diet as a guide.

  1. Eat a clean diet and eliminate all sugar for three days. Yes, it will be challenging, but after those three days, you will likely have fewer cravings. Natural sugars from fruits are okay in small amounts, so make sure to eliminate artificial sweeteners and added sugars, too.
  2. Eliminate gluten and dairy. These are two of the biggest inflammatory food triggers. Note, it does take two to four weeks for these to be completely out of your system.
  3. Make sure that you’re really managing sleep. Any type of sleep deprivation is going to have a direct correlation with your bacteria in your gut.
  4. Focus on destressing and scheduling relaxation: Taking time to totally de-stress, whether that’s scheduling 15 minutes of relaxation, getting a massage, or setting time aside to meditate, do yoga or simply breathe, is vital.  Stress is one of the biggest inflammatory triggers in on your body and can significantly affect your gut bacteria.
  5. “Move well and then often.” Gray Cook: Exercise also has a positive effect on the bacteria in your gut.

The Bottom Line 

The goal is to do all of this for three days. If you do this challenge, you can really begin your journey to making health changes well beyond. Of course, this is just the beginning of a healthier lifestyle. If you feel like your issues are more significant, feel free to email me, and I can provide you with a questionnaire to see if you fall more into the category of potential yeast overgrowth.

If this was helpful, please give it a like, share it, and subscribe to our YouTube channel, the Movement Paradigm, for weekly tips on mindset, nutrition, and movement. Our goal is to help you live your best life, heal, transform, and, more importantly, thrive.

You can always join us in our app, the Movement Paradigm. We have lots of challenges every other month—everything from movement to the nervous system, nutrition, and so on. And we have a great community of people. 

You can also reach out to us for an individual appointment for functional medicine or holistic physical therapy. If you really want to get to the root cause, please reach out to us.