How to train your core without crunches

Did you know that you do not have to do crunches and sit-ups to train your core? In fact, crunches, sit-ups, and many other similar core exercises can negatively impact your core, especially if they’re not done properly. How can you train your core without doing crunches?

Rather watch or listen?

What comprises our core?

Let’s break the core down. We have our local stabilizers, global stabilizers, and global mobilizers.

Our local stabilizers include our pelvic floor (base of our core), diaphragm (breathing muscle), multifidus (along the spine), transverse abdominals (like a corset), deep posterior psoas (hip flexor), and the deep hip stabilizers (deep five). These muscles are close to the joint and isometrically contract to create stability and control the joint positioning. This improves what we refer to as joint centration, maintaining our joint on its center axis.

Next, we have our global stabilizers. This includes our glute medius, obliques, spinalis muscles in the back, and quadratus lumborum. These muscles are also geared toward stabilizing, but they create more of an eccentric range of motion. They decelerate motion.

Lastly, is our global mobilizers. This includes rectus abdominis, latissimus dorsi, and quadriceps, and so on. These muscles produce force. They initiate force and movement. All of these are equally important. However, one has to come first, and that is the local stabilization. We have to be able to stabilize our joints to be able to produce force and power from a stable foundation. If you don’t have a stable foundation to operate from, an injury will occur.

Why is it important?

When we refer to the deep core and how it is intimately connected with your feet, and the rest of your body, I like to use the reference of the deep front fascial line. This connects from the bottom of the foot fascially all the way up through the inner thigh, pelvic floor, deep stabilizers, diaphragm, and even the neck. The beautiful representation of this fascial tensegrity is a great visual of how our body is connected, and how our feet are actually part of our core.

Another great way to appreciate this deep local stabilization and the importance of the local stabilization before the global stabilization is a hernia.

Whether you or someone you know has had an umbilical hernia, inguinal hernia, abdominal hernia, or sports hernia, this is a perfect example of where the deep core was not stabilizing efficiently. There was so much stress on the outer core musculature and poor pressurization in the abdomen that it caused a tear in the abdominal wall, or in the case of a sports hernia in the fascial tissue.

In the case of a sports hernia, which is very common but often much overlooked and misdiagnosed, the fascial tissue most often affected connects the rectus abdominus and the adductor. The adductor muscle will have a mechanical advantage so when there is a loss of deep stability, it will create a tear in the fascia in the rectus sheath. You cannot rehab this since you’ve lost the integrity in this force transmission system.  It can only be surgically repaired.

Now, back to the deep stabilizers. It is important to train the deep inner local system before the deep outer global system to prevent things like hernias, back pain, hip pain, and neck pain You can have an optimal foundation to work from to generate force with power and be able to do the things that you want to do. If you are doing crunches, sit-ups, or leg lowers without a proper foundation, read on.

What exercises can you incorporate in your routine?

Here are five different exercises that you can incorporate into your routine or refine if you’re already doing them so that you do not need to do crunches and sit-ups, but you can do these exercises to maximize the potential of your core.

1) Diaphragmatic breathing with pelvic floor contraction

As you inhale lengthen the public floor, relax, and then as you exhale gently lift the pelvic floor about 20 percent contraction in the direction of your head. Repeat this for eight to ten breaths working on the coordination and rhythm of the breath with the pelvic floor contraction.

2) Step by step hollow

Take a breath in and flatten your back as you exhale. Next, take a breath in, exhale, and lift your head and shoulders, reaching through your fingertips. Take another breath in, exhale, and pull your hamstring in towards your body, and then repeat with the other side. If that feels appropriate there stay in that position for a couple of breaths. If you’d like to progress, take a breath in, exhale, and raise your arms overhead keeping the hollow position and the tension. Then reach with the other arm. If you’d like to go to the full progression if that feels appropriate to you, then you would extend one leg, and then extend the other leg.

3) Beast

The beast position is in a stable position with your index finger parallel and spreading your fingers wide. Then corkscrew your shoulders, tuck your toes under, and lift your knees approximately two inches or so above the ground. Use your breath as your repetition. You can do this for as many breaths as you can hold. You can also progress into a crawling motion.

4) Side plank

This helps with lateral stability. The first progression is with your elbows underneath the shoulder, the bottom knee bent, and the top leg straight. If you’d like to progress this you can go into a staggered stance or even a stacked posture.

5) Foot to core sequence

Standing on one leg in an athletic position, take a breath in, as you relax your foot relax your pelvic floor, exhaling rooting the toes into the ground. Repeat that for five to eight breath cycles. As you do that you’re rooting the tips of the digits into the ground. You can then move into a bowler or any other type of dynamic motion, inhaling back and exhaling short footing, and coming back to the standing position.

There you have it—five different ways you can begin to shift your core training to focus on local stabilization before moving to global stabilization and movement. You can use these as ideas. There are endless exercises that can fit into this category but this is just to get you thinking a little bit differently about how to train your core the best way possible so that you can improve your performance, decrease your injury prevention, and feel your best.

Reach out for a 15-minute FREE discovery session to see how we can help you on your journey.

For more content, make sure to subscribe to our YouTube channel here.

Other things that may interest you:
Vagus Nerve Hack | Sphinx

Vagus Nerve Hack | Hand Reflexology

Top 5 Vagus Nerve Hacks to Help You Relax and Restore

DO YOU HAVE A SOCIAL DILEMMA?

Do you have a social dilemma? Do you love to stay connected to your friends, family on Facebook or Instagram, but do you feel like you just scroll aimlessly checking out what everyone else is doing for hours. Do you feel addicted to the “like” button? Anytime you post, can you hardly wait to see who’s responded to it? If you answered yes to any of those questions, then you are just like most Americans and people all over the world. We are seeking “social” approval. We are constantly posting and potentially comparing ourselves to what everyone else is doing. Meanwhile, all of the social media platforms have algorithms that know exactly what we’re doing at all times. They know what we’re thinking, what type of personality we have, and what our interests are. Hence, all of the specific ads targeted us. They are watching every move we make and are therefore manipulating our decisions and actions.

According to the American Journal of Epidemiology, there was a 5,000 person study that showed that a significant increase in social media uses correlated with higher mental and physical health issues as well as decreased life satisfaction. Sixty-four percent of the people that have joined extremist groups on Facebook have done so because the algorithms have directed them there. The list goes on. If you have children or teenagers, I’m sure you’re well aware of how it affects communication, their interests, and how they play and interact. We used to go out and play, but now children want to play on the computer, YouTube, Instagram, or any other game or social media platform. We see in our practice every day how it can impact body image and confidence issues in women AND men.

Let’s not forget all of the amazing things about social media. It’s great for businesses marketing. It’s powerful to be able to connect with people you haven’t seen for years, and how to be able to stay abreast of all the things that are happening in your family and friends’ lives.  There are so many wonderful things about social media too, hence the social dilemma.

What can you do to get control of your social media to use so that it’s benefiting you, your life, your family, your friends, and everyone around you, as opposed to negatively impacting your mental, physical, and emotional health?

1) Setting aside time every day to look at social media. Block time so that you are limiting yourself to a certain amount so that there will be less aimless scrolling and more intentional use. Then, stick to it!

2) Delete all notifications on your phone. That means Facebook, Instagram, email, etc. notifications. Delete them all, so that way you can choose what and when you are going to look at these different platforms and you are not being dictated by the algorithms.

3) Aim to follow organizations and people that you believe in, you trust, you respect, and admire so that when you open your feed it is not filled with things that do not make your life better.

4) Watch the social dilemma. If you haven’t already, it is an outstanding movie that will change the way that you think. It has shifted my thinking, and how I’ve organized my time and planning for looking at social media. I hope that it will have the same impact on you and your family.

Reach out for a 15-minute FREE discovery session to see how we can help you on your journey.

Other things that may interest you:

6 ways to improve your sleep

Leaky Gut: The Root of Chronic Disease

Jaw-Emotion Link

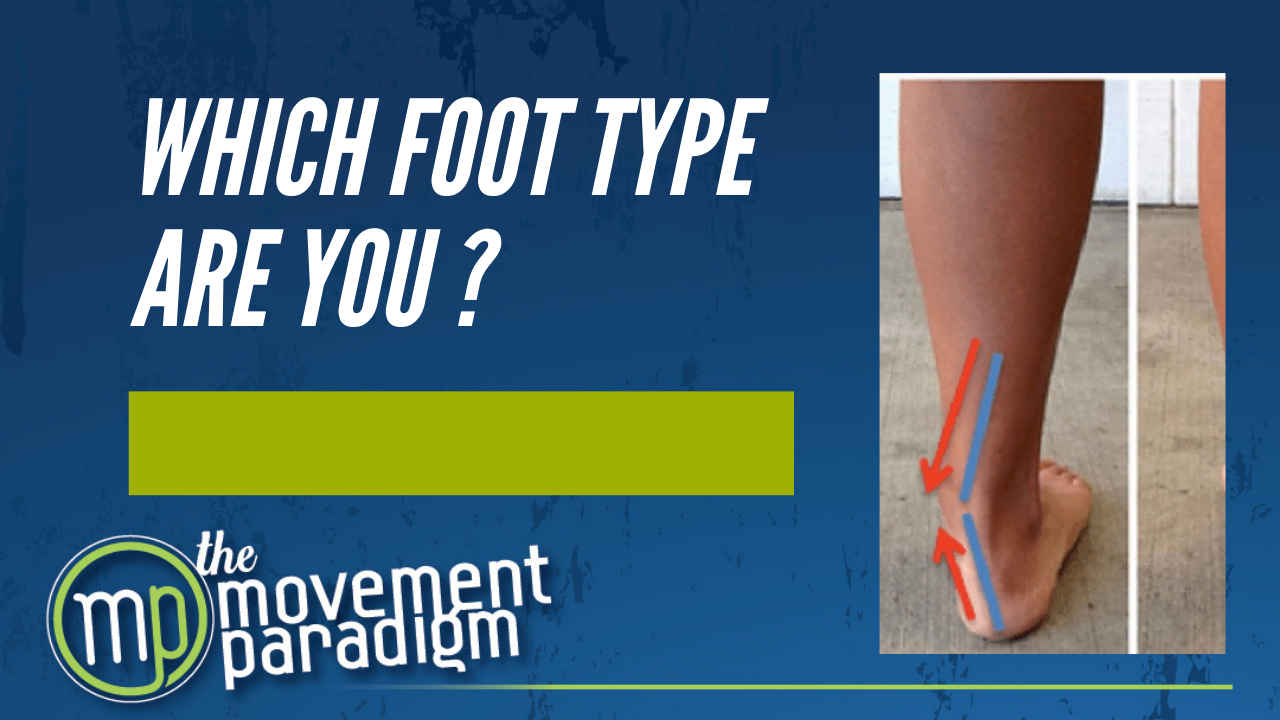
Which foot type are you?

Did you ever wonder what your foot type is? And if so, do you know the impact of your foot type on your movement, gait, and injury risk? How can you address your foot type so that you are maximizing your foundation, i.e your feet. You’ll want to connect your foundation with your core and integrate into your dynamic movement to stay injury-free.

We have three primary foot types;

  1. Everted foot type
  2. Neutral foot type
  3. Inverted foot type

None of these foot types are bad in and of themselves. However, it is important to understand the impact that it can have on function, as well as potential injuries.

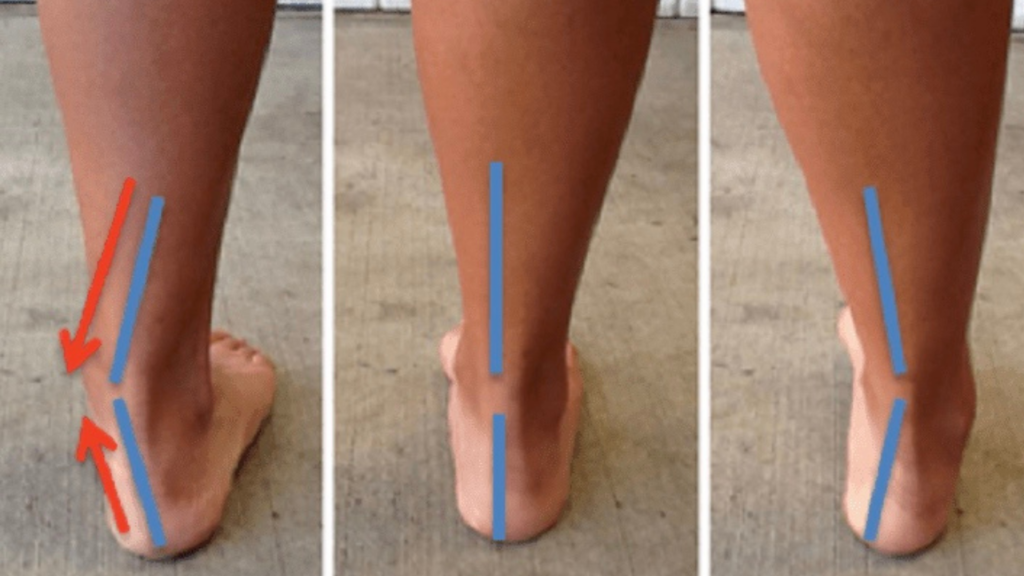
On the left is the everted foot type which is associated with being unlocked and unstable. This foot type is typically classified as the flatter foot type or the more pronated foot.  The neutral foot type is in the middle, which is the optimal foot position. On the right is the inverted foot type which is associated with being locked, rigid, and stable. This foot type is commonly viewed as the high arched foot type.

Each foot type has different implications on movement and overall function. Therefore they should be addressed in an individualized manner. For example, if you have more of an everted foot type, a flatter, unstable foot, then the lateral structures of the lower legs will likely be tight. The outside of the lower leg and calf would need to be mobilized, and then the foot needs to be strengthened. In an inverted foot type, a locked, rigid foot type, it is important to mobilize the muscles on the inside of the calf and improve active ankle mobility to bring the foot into neutral. All of them will require some type of integration with your core and into dynamic movement.

There are exceptions to every rule, however, and there are different pathologies that you or someone you know may present with that need to be factored in. In addition to performing the appropriate exercises to balance your foot, you’ll also want your footwear to enhance your natural foot function, rather than replace it.  Your foot type, injury history, movement, and pathologies will determine which shoe would be best for you.

If you would like to understand what foot type you are and what to do about it please reach out for a 15-minute discovery session so that we can guide you on how we can help you on your journey.

If you need help on your journey to better health, contact drarianne@staging.movementparadigm.flywheelsites.com to schedule a FREE 15 minute virtual consultation.

For more content, make sure to subscribe to our YouTube channel here.

WHAT IS A HEALTHY PELVIC FLOOR?

Let’s discuss a much-overlooked topic in modern medicine, especially as it relates to rehabilitative medicine… the pelvic floor. Yes, both men and women have a pelvic floor, and both can be compromised and contribute to many different conditions including but not limited to incontinence issues, sexual issues, and chronic pain.

The pelvic floor is essentially the base of our core. It has to be integrated with the rest of the surrounding anatomy. That means the organs, the bowel and bladder, the connective tissue, and the ligamentous tissue all have to be deeply integrated and fine-tuned for everything to work in this rhythmical dance back and forth.

It also helps to support our daily functions, prevent urinary and fecal incontinence, improve sexual function, and many other functions that we’ll discuss.

So, what does a well-activated pelvic floor actually do?

1) We are constantly transmitting force through the body. So, a well-activated pelvic floor is going to attribute to the closing force to prevent any leakage of urine, fecal, or gas.

2) Research shows that between 60 to 80% of women with stress urinary incontinence can cure it or significantly improve it with pelvic floor retraining.

3) A well-activated pelvic floor is also going to allow the appropriate relaxation response of the pelvic floor muscles to allow for proper emptying of the bladder and to prevent any post dribble or leakage after you’ve finished urinating.

4) It should also be relaxed enough for proper evacuation of the bowel, but provide enough resistance for optimal defecation.

5) It supports internal organs such as the vagina, the bowel, and the bladder. Especially as it relates to women and pregnancy, the more intact the pelvic floor musculature is, the less likely there will be a prolapse.

6) It increases the tone which allows for greater sexual awareness. You need to have a pelvic floor that can relax completely so that you can have more pleasurable pain-free sex.

7) A well-activated pelvic floor will relax and significantly stretch during vaginal delivery.

8) A well-activated pelvic floor will work in coordination with your diaphragm and the rest of the abdominals. This is very important in looking at overall movement and movement efficiency.

Why is a well-activated pelvic floor important?

In summary, a well-activated pelvic floor is important for so many necessary functions. When it is not functioning well, it can contribute to a whole host of problems. One of which, that we see consistently in our office is pain.

Chronic pelvic pain, low back pain, hip pain, and even knee pain can all be driven by pelvic floor dysfunction. It’s way more common than you think!  It’s also an area where we tend to hold our emotions. So, I want to point out that as important as it is for the pelvic floor to contract, it is equally important for the pelvic floor to relax.

If it is always tight, then we are not able to fully contract and fully relax it. This can contribute to the same issues. That is why it is very important to get evaluated properly. If you are having any type of symptoms that might indicate you have a pelvic floor issue, please contact our office to schedule a pelvic floor examination.

Reach out for a 15-minute FREE discovery session to see how we can help you on your journey.

For more content, make sure to subscribe to our YouTube channel here.

Other things that may interest you:
Stop Stretching Your Hamstrings

3 AREAS IN YOUR BODY YOU HOLD YOUR STRESS

Why You Shouldn’t R.I.C.E.

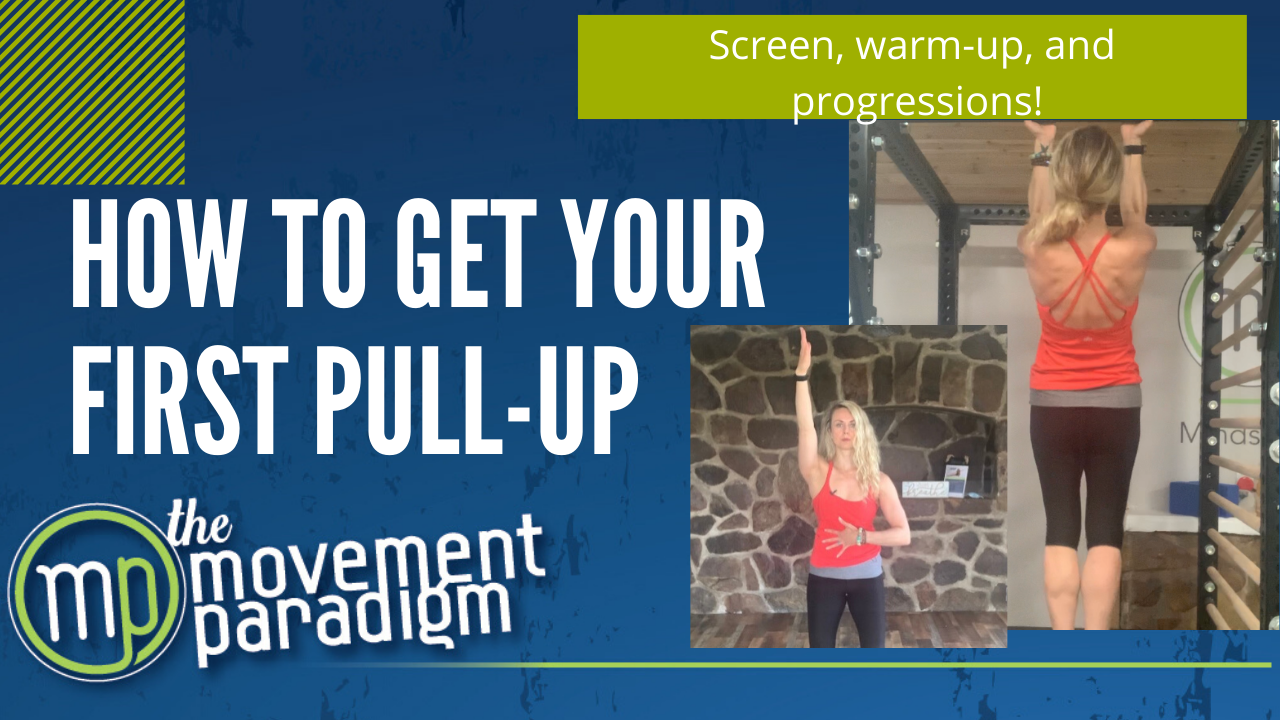
HOW TO GET YOUR FIRST PULL-UP

Have you convinced yourself that you’ll never be able to do a pull-up, or you’ve tried with bands and assistance, but you’ve been unsuccessful? With the right exercises, time, patience, dedication, and hard work, you can absolutely do a pull-up. Whether you’re a child, an adult, a man, or a woman, it doesn’t matter. You have the potential inside of you to do a pull-up.

Pull-ups are one of the greatest human fundamental strength movements that we all can do. However, before you work on pull-up progressions, you do want to make sure that you have checked a few boxes. So, here are the boxes you need to check.

1) Do you have good shoulder and scapular mobility?

To test this, see if you can get your arm completely overhead so that it is in line with your ear without pain or discomfort. If you can great, move on to the next box. If you can’t, that is what you want to start to work on first.

2) Do you have proper breathing mechanics?

To test this, see if you can breathe through your diaphragm as you inhale. This means having 360 degrees of intra-abdominal pressure. When you inhale, your abdomen will expand like when filling a balloon. Then, as you exhale, you’re creating this abdominal tension as your ribs descend towards your hips and you’re actively pulling your belly button in towards the spine, thinking of it as a corset. If you are still breathing from your neck and shoulders, it will make it very challenging to do a pull-up successfully.

3) Are you able to hold a hollow plank?

Are you able to control your body weight in a closed chain position (hands connected to the floor) while breathing and creating optimal tension throughout the body? Can you be strong, but relaxed?

Once you check those boxes, now you want to make sure that you’re prepared for the pull-up. So, let’s start with shoulder CARS (controlled articular rotations). For shoulder CARS, you’ll want to have good tension through the ground, feet strongly connected and rooted in, and ribcage down. From here, starting with your right arm, taking a breath in, slowly bring your arm up, ribs coming down. When your arm is overhead, will first externally rotate, and then internally rotate keeping your arm as close to your body as you can, without losing this position.  Perform this next to the wall to maximize the effectiveness. The goal is to create this total-body tension to create active control of the shoulder. This will make sure your shoulders are prepped. Repeat for five in each direction.

Next, you can do the bear walk to make sure that you’re working on good scapular and shoulder control before pull-up progressions. Watch the video here to see how to perform this. Now, let’s get it to the five pull-up progressions you should do before completing a full pull-up.

5 Pull-Up Progressions You Should Do Before Completing A Full Pull-Up

Pull-up progression 1: Dead Hang

For the dead hang make sure that your hands are in line with your shoulders when hanging from the bar, you’re in a slight hollow position maintaining your breath, and your arms are in line with your ears. Aim to hold this for at least 30 seconds to a minute before going to the next progression.

Pull-up progression 2: Pull-up Prep

This is a very key part of the pull-up. You want to maintain the same hanging position, and then lower your shoulder blades, and then raise them back up slowly with control. You want to make sure you are maintaining the same alignment the whole time with your head in between your arms. Repeat this for as many reps as you can with high quality.

Pull-up progression 3: Isometric Hold

For the isometric hold, you’ll want to jump into the position by standing on something where you can reach the bar from. Once you grab onto the bar, pull yourself up using an underhand grip so your head is over the bar. (This grip is recommended to start before progressing to an overhand grip). You want to make sure you’re pulling the elbows down towards the ground maintaining that slight hollow position with a neutral head position you’re while breathing and head. Hold this position for 30 seconds to a minute.

Pull-up progression 4: Eccentrics

To work on strength, perform eccentric pull-ups. To do this slowly lower all the way to the bottom of the motion completely finishing it, and then returning to the top by standing on your block, so you can grab the bar again. You’re avoiding the concentric portion and just focusing on the eccentric portion. Make sure to maintain your hollow position, breathe, and keeping nice control. Repeat for as many reps as possible with control. Progress to five sets of five for three to six weeks.

Pull-up progression 5: Bringing It All Together

Now you’ll begin to put these together, starting with an isometric hold into your eccentric, and then a pull-up prep.

Now you’re ready to perform the full pull-up! Finish the motion completely and finish with the pull-up prep at the bottom.

This may take you weeks to months depending on your level of fitness. Make sure to master the progressions before moving on.  

Pull-ups require patience, hard work, time, and dedication. However, I’m confident that you will be able to perform this movement while doing all of these progressions. Remember you still want to build overall strength, so make sure to incorporate other types of total body strength training to enhance your progressions and performance with this movement.  A common question is “should I do assisted pull-ups with bands?” They are not recommended because they do not build the fundamental strength required for a pull-up. Please make sure to not take any shortcuts and work on the progressions.

Reach out for a 15-minute FREE discovery session to see how we can help you on your journey.

For more content, make sure to subscribe to our YouTube channel here.

Other things that may interest you:
Vagus Nerve Hack | Pelvic Floor Hack

5 steps to addressing SI Joint pain | the truth about SI

The benefits of GROUNDING | Earthing

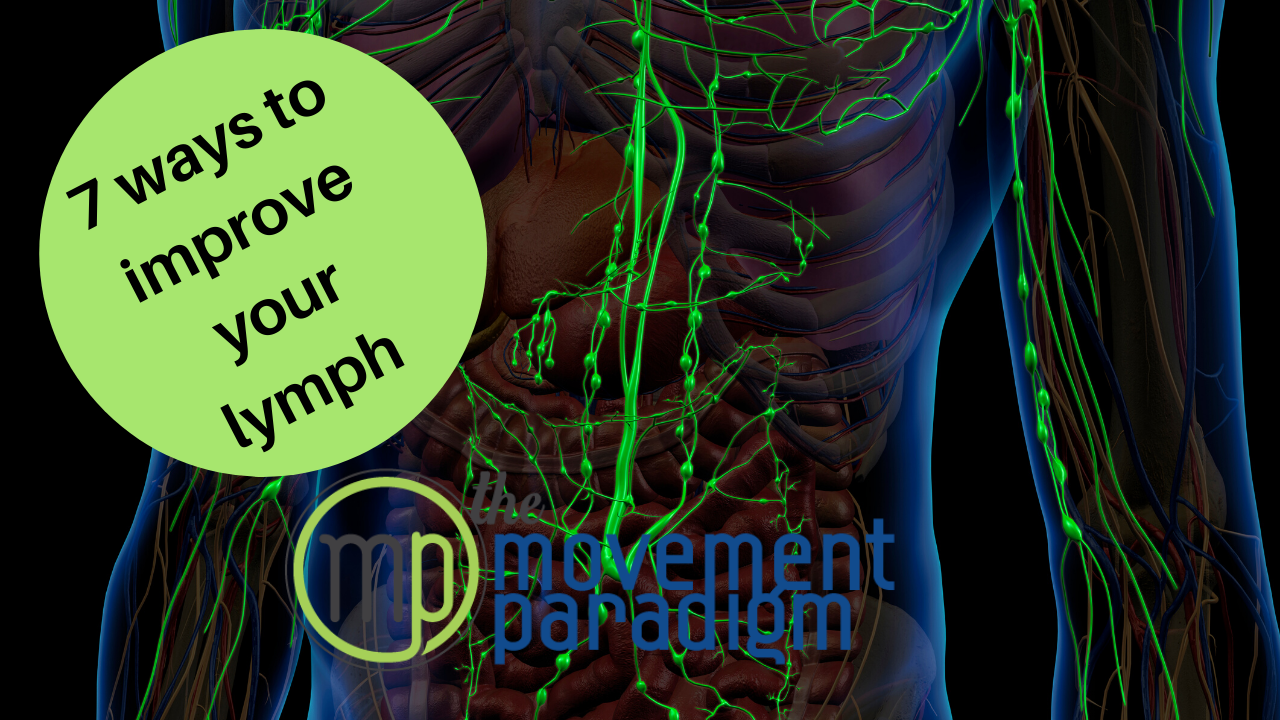
7 Ways to Improve Your Lymphatic System I Beginner Lymph Drainage

Let’s discuss one of the most powerful and most neglected systems in the body, the lymphatic system. The lymphatic system is a critical part of the immune system and is vital for protecting us from illness and chronic disease.

Seventy to 90 percent of all chronic disease is linked to inflammation. How do we get rid of inflammation? Primarily through our lymphatic system or other detoxification systems or organs including our liver, kidney, lungs, skin, GI system, tongue, and fat.

We are made up of 80 percent water. Let’s compare the lymphatic system to an aquarium. We can appreciate that if the aquarium has clean, filtered water everything in the aquarium (the fish, algae, etc) is going to not only survive but thrive.  However, if that tank is unfiltered, becomes toxic and infected, everything in the tank is also going to become toxic and have a lack of oxygen and nutrients.  Therefore, it cannot survive, let alone thrive in that toxic environment.

As one of my mentors, Dr. Perry Nicholson says, “you cannot get well in the environment that you got ill  in.”

Symptoms of a Poor Lymphatic System

If you’re experiencing these symptoms, then you most likely have a lymphatic issue but truthfully if you’re living in modern society, you most likely have a lymphatic issue anyway because of how toxic our environment is. With that said, if you had things like morning stiffness, chronic pain or fatigue or stiffness, bloating in your face in your abdomen, varicose veins, brain fog, poor sleep, acne, bad breath poor capillary refill, and painful lymph nodes, then most likely you are dealing with some kind of lymphatic issue.

Amazing Facts About the Lymphatic System

The lymph system is pretty darn amazing. There are over 700 lymph nodes in the body and over one-third of them are in the neck. There are 15 liters of lymph in our body. All of the lymph is pumping in one direction, the direction of the heart, and it’s deeply connected to the gut.  It is connected through the Gut Associated Lymphoid Tissue (GALT), specifically the Peyer’s patches. Remember that 70 to 80 percent of our immune system is in our gut! Now you can appreciate this deep connection of the lymphatic system to the gut. If there is a gut issue, there is a lymph issue!

7 Ways to Improve Your Lymphatic System

What can you do if you have a lymphatic issue? What you can you do to help optimize your immune system? Here are seven key ways that are very easy things to integrate into your life and should be foundational.

1. Diaphragmatic Breathing

The two key ways to improve your lymphatic system are movement and breath. Let’s speak about breath first. When I refer to breathe, I really mean diaphragmatic breath.  You are using the diaphragm to actually create a pumping mechanism that is going to pump the lymph to the cisterna chyli, which is one of your main lymph drainage points in the center of your abdomen.

Breathing diaphragmatically is going to improve the chances of having a healthy lymph system.  We breathe 20 to 25,000 times a day. If we have stress breathing, however, and the diaphragm is very restricted, that is going to significantly impact the function lymphatic system. Breathing is your superpower!

Try taking at least three diaphragmatic breaths every hour and breathe for five min in the morning and at night before bed.

2. Movement

Once again, movement is one of the most important things to do to improve your lymphatic system.  We want to think of hydrating the tissue and moving the lymph system.

Try to move frequently throughout the day, not just for one hour and then sitting the remaining part of the day.  Think about movement snacks. As Gray Cook says, “move well and then often.”

3. Staying Hydrated

It seems very simple, but also very challenging for many people. Remember, we are 80 percent water so it is very important for the lymphatic system to be well hydrated.

Make sure that you’re drinking at minimum, eight, eight-ounce glasses of water a day, and always making sure that your urine is yellow is a pale yellow to clear.

4. Anti-inflammatory Nutrition

The more inflammation that we have, the more toxic our environment is. We cannot get well in the environment that we got ill in. Focusing on an anti-inflammatory diet, getting rid of any gut infections anything like yeast overgrowth or SIBO (small intestinal bacterial overgrowth) that you recognize is contributing to a poor lymphatic system is essential.  

All of these systems work together, so it’s really important to address any underlying condition and really focus on a well-balanced whole food natural diet.

5. One-minute Lymphatic Drainage

This is the most basic version and is for beginners. It’s a great starting point for many people.  If you go too fast, too soon with the lymphatic system, you can actually cause a huge detoxification reaction, and it can make you feel very ill. This is a great way to simply start the process, and if you have any negative symptoms, you would wait until those symptoms are resolved for you to progress. Ultimately, the goal is to do this daily. You could do it in the shower before you work out, or at any consistent and convenient time. Always make sure to follow with movement.

Watch the lymph drainage HERE.

Remember that for the lymph drainage the order is very important, you’re always starting on the left side and then moving to the right, and you start with above the collarbone area, move up to the jaw under the jaw, and then go into the pec, then the abdomen, then the inguinal area, and then behind the knees. The order is very important and perform five pats in each place.

6. Vagus Nerve Stimulation

The vagus nerve is the longest nerve in the body, one of our cranial nerves that regulates our parasympathetic nervous system. We can stimulate the vagus nerve in many ways; through breathing and meditation, specific cranial nerve exercises, humming, chanting, yoga, and more. Because we can improve that parasympathetic system (rest and digest state), we can impact our breathing, and therefore our pumping action of the lymphatics. 

You’ll want to make sure that you one or more of these practices in your daily life.

7. Decreasing Stress

When the HPA axis (hypothalamic pituitary adrenal axis) is activated, our stress pathway in our body, we’re ultimately going to release cortisol. Cortisol can break down proteins. More specifically, it can break down collagen. Collagen is the main structural protein in the extracellular matrix of connective tissue in the body and is the most abundant protein in our body. Therefore, the breakdown can impact the structure of the cells in the lymphatic system, which therefore can cause blockages and decreased blood flow, which ultimately, in turn, means that there will be more congestion and a more toxic environment.

Please find the things that help YOU manage stress! Please see how to map your nervous system.

So there you have it, seven different ways to improve your lymphatic system, and hopefully with a little background information to help you on your healing journey.

Source: Dr. Perry Nichelston, Stop Chasing Pain

Disclaimer: This is not intended to treat or diagnose. Please check with your physician or functional medicine practitioner to determine a specific plan.

Reach out for a 15-minute FREE discovery session to see how we can help you on your journey.

For more content, make sure to subscribe to our YouTube channel here.

Other things that may interest you:
Vagus Nerve Hack | Auricular Ear Release

Top 5 Vagus Nerve Hacks to Help You Relax and Restore

Vagus Nerve Hack | Neck Release

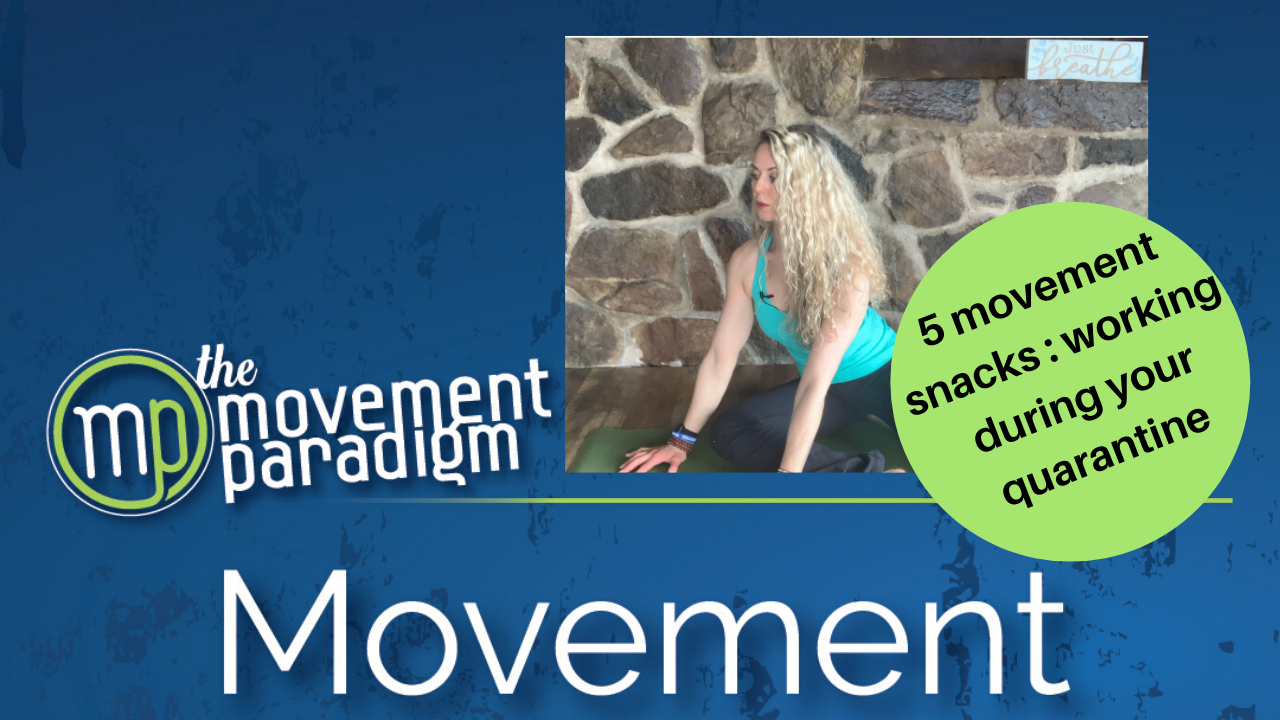
5 MOVEMENT SNACKS | Working at Home During Quarantine

I know that many of you have been working at your desk all day during this quarantine. You may not be getting up as much and probably not feeling as great as you normally do. These simple exercises can be done at your desk or the surrounding area. Rather than heading to the kitchen, here are five movement snacks that you could do throughout your day to help you get focused, energized, and maintain your mobility.

1. Cross Crawl Pattern

The cross crawl pattern will stimulate the right and left hemispheres of the brain, ultimately waking up the logical and the creative side of your brain.

To do this exercise, while sitting, place your hands behind your head, and then exhale as you bring your elbow to your opposite knee. You do not need to touch each direction but just try your best. Repeating for a series of 15 to 20 repetitions. You can also do this from standing, and the same idea, bring elbow to opposite knee. View the exercise HERE.

2. Foot Release

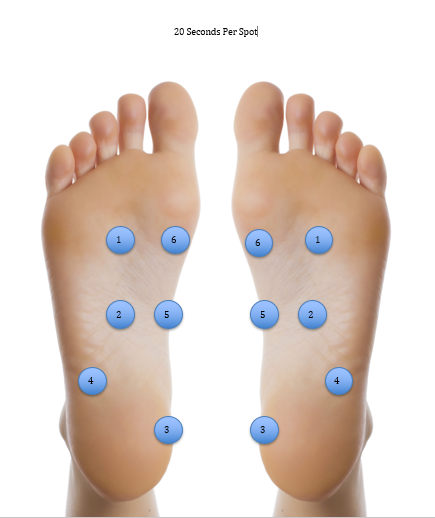
The foot release can be done from a seated or standing position. You can use a ball that’s the size of a golf ball. I love the RAD rounds for this. The foot release is really designed to improve the mobility of your foot and hydrate the fascia, helping to keep it elastic. You’re also stimulating certain receptors in the bottom of the feet that have a direct link to your brain. From an  Eastern medicine perspective, reflexology, by applying pressure to reflex areas, is said to remove energy blockages and promote health in the related body area and research has shown to stimulate the vagus nerve as well. I recommend this to nearly every patient. It is a very powerful exercise, very simple to do, and feels amazing. It will take you just a few minutes on each side.

To do this exercise, use a small ball on the six different points on the bottom of your foot that will be included in the picture below. You’ll hold the ball in each spot for about 20 seconds, making sure that you feel a nice release (about 75% decrease in pain/discomfort), and then moving on to the next spot. View how to do the exercise HERE.

foot release
6 point Foot Release

3. Half Salamander

The half salamander exercise is a cranial nerve reprogramming exercise. The goal of it is to improve the thoracic mobility, ribcage, and sternum motion, and improve the blood flow around the vertebral arteries, and ultimately the upper cervical spine. It is very simple to do and you could do it multiple times throughout the day to have a cumulative effect on the neck, shoulder, and thoracic mobility.

To do this exercise, first, check your cervical range of motion. You can do this by looking to the right and left to see if there’s any asymmetry or restriction. Then, place your hands behind your head and you’re going to side bend to one side and then look with your eyes in the opposite direction. Make sure to keep your face forward, and you’ll hold this for 30 to 60 seconds. You would of course repeat on the other side, and then you would recheck your cervical range of motion, which should be improved. To see how to do the exercise, click HERE.

4. Thoracic Rotation and Side Bend

The thoracic rotation and side bending exercise is also a great exercise to do to help negate some of the sitting postures of that forward, often rounded position. You’re using your eyes to really help improve the range of motion in the upper back. Your eyes have a direct connection to the muscles in the back of your head, the occiput muscles. So, you’re using your eyes to really drive by looking as far as you can. Each time you should be able to get successive improvements.

To do this exercise, first, check your thoracic range of motion by rotating to each side see if there are any restrictions or asymmetry. Then, place your hands behind your head and you’re going to look with your eyes all the way to the right. Next, rotate as far as you can to the right keeping your hands behind your head. When you get to your end range, side bend. Come back to the center and return to your start position. The next time, you’ll rotate even further, looking with your eyes as far as you can to the right. Then, once again side bend. Each time you should be able to get farther and farther. Repeat three times on each side, and then recheck your thoracic range of motion, which should be improved. To see the exercise, click HERE.

5. Hip Mobility 90/90

Hip mobility is very important, so you want to make sure that you take the opportunity to get down on the floor and maintain your hip motion, especially if you are going to be sitting all day at your desk. You do want to make sure that this is active-controlled mobility, so you want to make sure that you’re breathing diagrammatically in each position to convince your nervous system that you are safe in that position. Go to the point where you feel some discomfort, but it should never be painful.

To do this exercise, you will start with a 90/90 hip position. From this position, slowly rotate to the other side maintaining an upright trunk position. Using your breath, exhaling, as you rotate, and then taking your big inhale to prep the motion. Make sure you are doing this in a comfortable position and that there is no pain. Then, move into a reaching forward position on the front leg.  Use tension by pushing into the ground, pushing the ground away, and hinging from the hip. It may be farther for some than others. Next, you’ll open your back up and rotate to the front leg. You’re really trying to open your chest and extend your hip on that side. Make sure to really squeeze your glute to maintain that position while breathing. To see how to perform, click HERE.

Summary

I hope that was helpful and that you gained some new movement snacks that you can do throughout your workday, especially during this quarantine. If this was helpful for you, please make sure to share it with your friends and family.  The rule of thumb is to move EVERY 30 minutes while working, so try one of these or take a quick stroll. Better yet, do both!

Reach out for a 15-minute FREE discovery session to see how we can help you on your journey.

For more content, make sure to subscribe to our YouTube channel here.

Other things that may interest you:
WHY DO YOU HAVE CRAVINGS | 4 reasons

Top 5 Vagus Nerve Hacks to Help You Relax and Restore

What To Eat To Improve Your Nerve Health | 10 NUTRIENTS

8 Common Mistakes in Your Plank & 8 Ways to Improve It

Have you ever done a plank or would like to know why you should do planks? Let’s discuss eight ways that you could potentially compensate in your plank and more importantly, eight ways to correct them.

Why are planks important?

The plank is considered an anti-extension, or back bending exercise, that is targeting the anterior (front) core. It really helps to improve the midline stability of the body. We need that for all movement patterns. If we think about our basic daily life patterns to our exercise patterns such as deadlifts, squats, and kettlebell swings, the plank is a foundational movement for all these. We’re not looking for perfection, we just want to maximize the effectiveness of the exercise that you’re doing. That’s what you want to do with all your training, but especially in this exercise.

8 Common Mistakes in Your Plank & 8 Ways to Improve It

So, let’s take a look at compensations you could be doing in your plank and ways to improve on them.

1) Holding for time

When you set up with the timer in front of you and you hold as long as you can, you are probably not getting the benefits of the exercise. It is easy to “power through” with your legs and arms. Some try to hold for three or five minutes, but really that’s not the point of the plank.

What to do instead:

Use your breath as your repetition

Instead of using time, use your breath as your repetition. When you get in the plank position, take a nice big inhale through your nose and exhale (out of your nose or mouth) drawing the belly button toward the spine and bringing your rib cage down. You want to hold that position for as many breaths as you can, which typically is about five to ten breaths.

2) Breath Holding

When people do not breathe during the movement pattern it can cause your body to recruit other muscles such as your back or neck muscles, and more importantly, you won’t be getting the most out of your plank.

What to do instead:

As we talked about using your breath versus time, learning how to breathe properly in the plank and all movement is very important. As you’re inhaling, your abdomen is expanding 360 degrees, when you exhale, the belly button goes in towards the spine and ribs come down to create some tension and bracing. When you are using your breath as your repetition and you are doing it properly, I can assure you that it will be many fewer reps than what you were probably doing already.

3) Looking up or looking down during your plank

Looking up with a hyperextended neck or just the opposite, looking down, can cause changes in how the body is stabilizing. If you are already having trouble with stabilization, this matters!

What to do instead:

Gaze towards the floor, holding your neck position nice and strong. This will prevent any discomfort and make sure that you’re stabilizing through the whole anterior chain in the front of your body.

4) Sagging your low back

The low back drops down or sags when you hold your plank position. You may even feel a little “tight” in your low back. This also causes a whole chain reaction and affects how you are stabilizing.

What to do instead:

Try slightly tucking the pelvis. You want to think about it as if your pelvis was a bucket of water and you are pouring it out the back. This little tuck will bring the ribcage over top of the pelvis. That will give you a much stronger position through the trunk, and it allows us to really maximize the recruitment of the front of the core.

5) Having your butt up in the air

This means that you’re really not stabilizing.  This could be intentional and it could be to accommodate certain movement patterns or pathologies, like limited toe mobility. That is okay-that is your intent!

What to do instead:

Bring your body more parallel towards the ground, and in which case, your shoulders will be slightly higher than your pelvis. You will have a slight angle there, but that is normal.

6) Bending the knees in the plank

When you bend your knees, you lose control of your whole body, especially the low back. A lot of times the low back sag and knee bent position will go together.

What to do instead:

Think about lengthening through your heel. That will give you a really nice strong tension position.

7) Sinking your shoulders

This is a really important one because a lot of times we see the shoulder blades sinking down. It can also commonly be referred to as “winging” shoulder blades. That creates a lot of stress on the shoulder, and it really destabilizes the trunk.

What to do instead:

Press the ground away. Spread your wings, which means that you’re spreading the shoulder blades. That gives you a really nice strong connection of some of the important scapular stabilizers that actually intimately connect with your core. This is really powerful because you get a lot more tension through the whole body when you do that.

8) Thinking you should do planks to improve low back pain

The truth is that when there is pain, there is decreased motor control, which means decreased stability, coordination, timing, sequencing, and activation of all these muscles. If you have acute low back pain and you think that doing a plank is going to help it, it might not be the best choice of exercise at that time. You want to make sure that you’re in a good place and you’ve been instructed by a qualified health professional to direct you on when this is appropriate.

What to do instead:

Focus on breathwork first and activating the deep core stabilizers. When you are in pain, it’s going to be more important to focus on the reflexive stabilizers, which is the inner core.

Summary

In summary, the plank could be a great exercise to include in your training program. If you’re already doing the plank, you can take this opportunity to clean up any compensations that we discussed today.

In summary, here’s how to do a proper plank:

  1. When you set up, you can think of setting your index fingers parallel, and having a really active hand, which means spreading those fingers really wide and that will take pressure off of the wrist.
  2. Place your hands directly under your shoulders and step back into that high plank.
  3. Make sure that the head is nice and neutral, keeping the eyes gazing at the floor.
  4. Press the ground away spreading those wings  (shoulder blades) with a slight tuck in the pelvis to stack the ribcage.
  5. Use your breath as a repetition.
  6. Lastly, lengthen through the heels to keep that strong position.

Reach out for a 15-minute FREE discovery session to see how we can help you on your journey.

For more content, make sure to subscribe to our YouTube channel here.

Other things that may interest you:
How to Understand and Eliminate Low Back Pain

Why you should stop “stretching” your hip | HIP PAIN

How to train your core without crunches